

In 2026, a high-resolution screen is no longer enough to guarantee a valid diagnosis; without precise calibration, even the most advanced hardware becomes a clinical liability. You likely understand the frustration of eye strain during a long shift or the nagging worry that your display doesn't meet the latest FDA Quality Management System Regulation (QMSR) requirements. Effective medical display calibration is the only way to bridge the gap between raw hardware capability and true diagnostic integrity. It transforms a standard monitor into a compliant medical device that protects both your patients and your practice.
We know that technical GSDF standards can feel overwhelming when you're focused on patient care. This guide simplifies that complexity by providing a clear technical roadmap to master DICOM PS3.14 2026c standards. You'll learn exactly how to maintain the required 350 to 420 cd/m2 luminance levels for general radiology while eliminating the manual guesswork of older systems. We explore how modern solutions like Jusha diagnostic monitors and Dextro Reading Stations automate these processes to ensure peak performance. By the end of this article, you'll have the expertise to ensure your imaging chain is optimized, compliant, and ready for any audit.
Key Takeaways
- Learn how to align your luminance output with the DICOM Part 14 GSDF to ensure diagnostic-level grayscale consistency across all imaging modalities.
- Understand the critical role of Lmin and Lmax ratios in maintaining the 350 to 420 cd/m2 luminance levels required for modern general radiology.
- Master the step-by-step process for medical display calibration, including environmental light control and the use of integrated Jusha front sensors.
- Discover how to combat the "Backlight Aging" effect through structured maintenance schedules to prevent diagnostic drift and regulatory non-compliance.
- Streamline your clinical workflow by leveraging pre-configured Dextro Reading Stations that automate compliance and remove technical complexity.
Understanding Medical Display Calibration and the Stakes of Diagnostic Accuracy
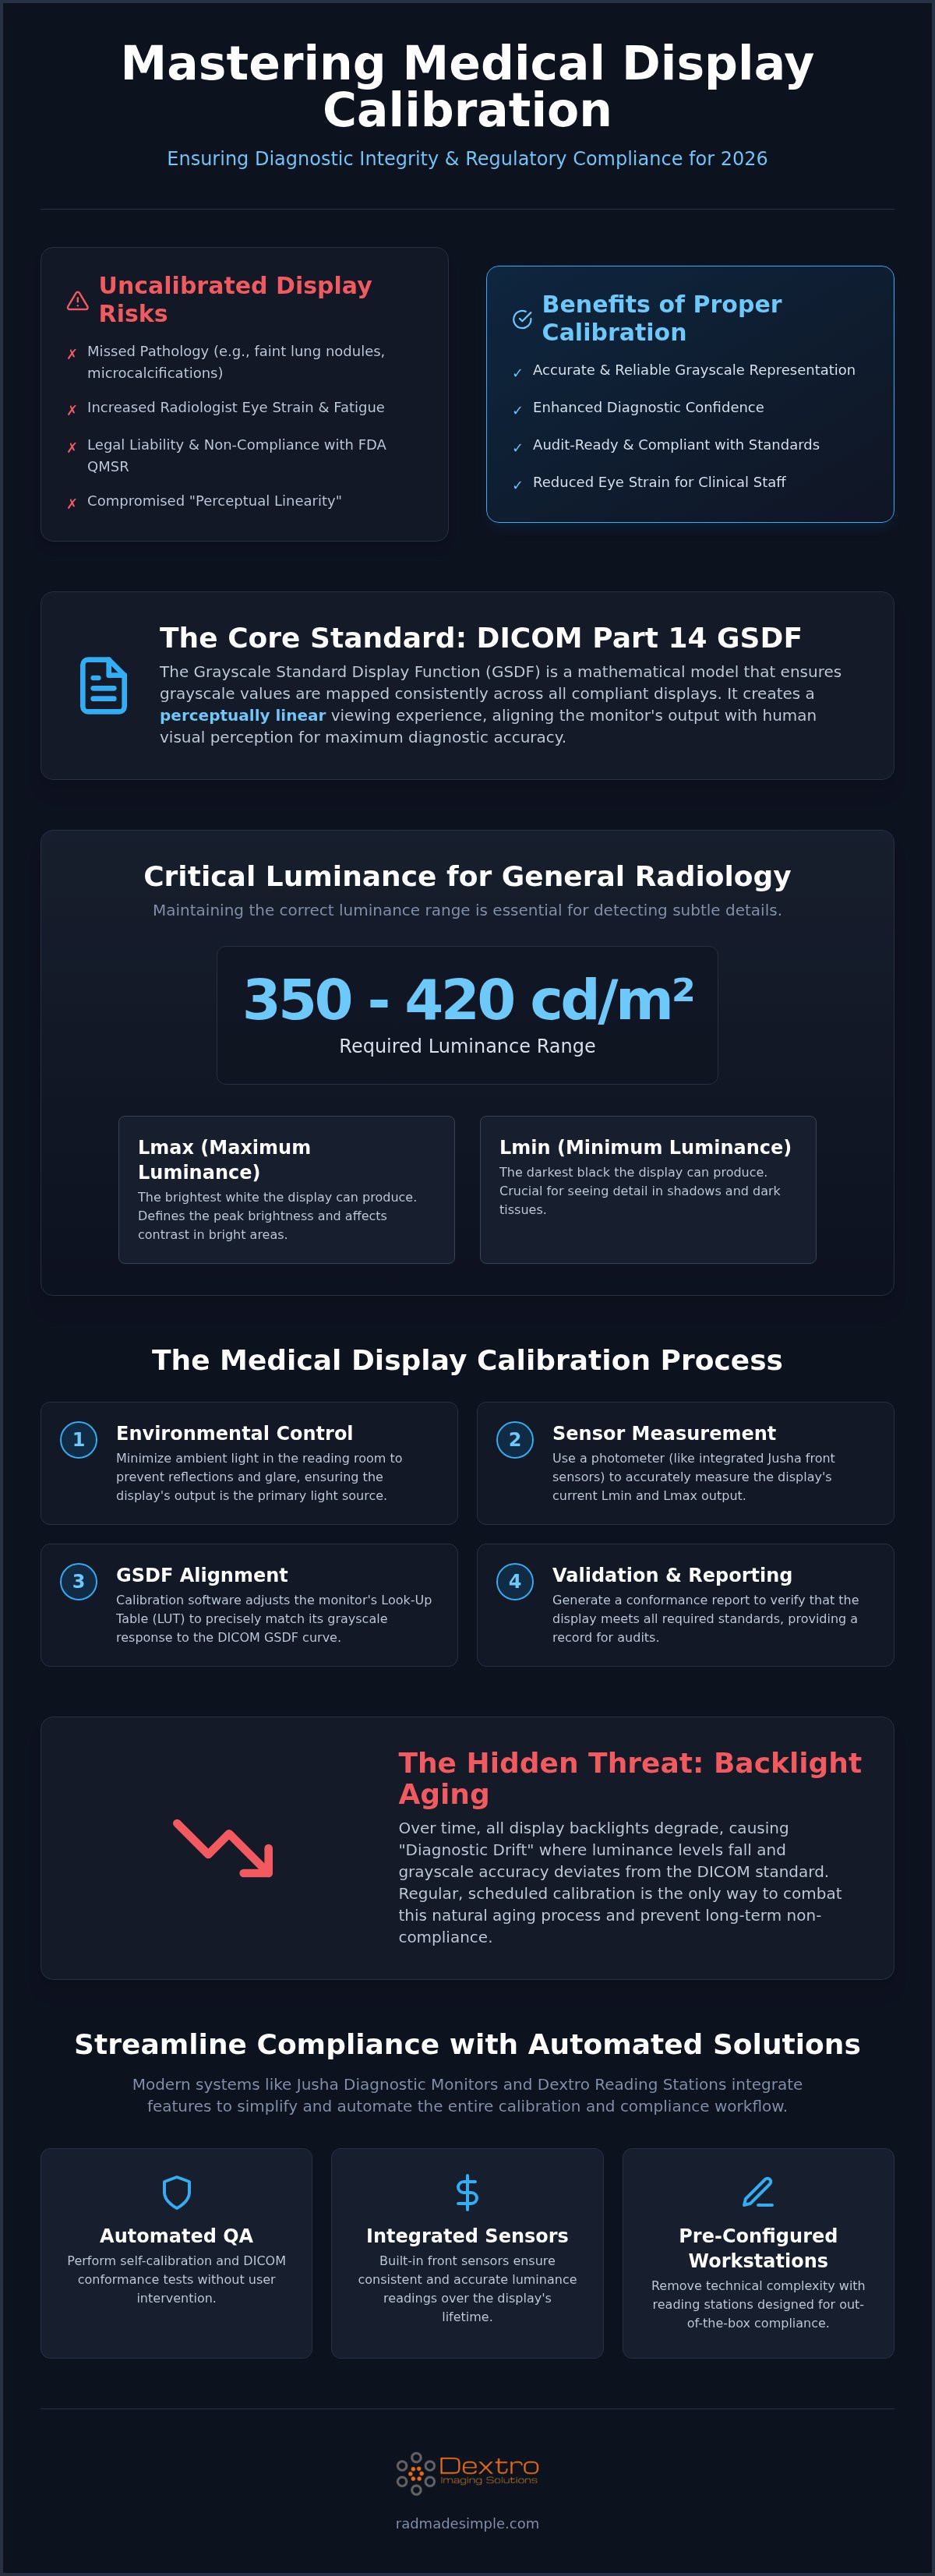
Medical display calibration is the precise alignment of a monitor’s luminance output to a standardized curve. It's not a simple one-time adjustment. Instead, it's a continuous process of ensuring that every pixel represents the correct clinical data. Without this alignment to the Digital Imaging and Communications in Medicine (DICOM) Part 14 standard, a monitor cannot reliably display the subtle grayscale variations required for a safe diagnosis.
Consumer-grade monitors fail in this high-stakes environment. They prioritize aesthetic brightness and saturated colors over linear grayscale accuracy. Over time, all hardware suffers from "drift," where backlights age and luminance levels fluctuate. This natural aging makes regular medical display calibration a safety requirement rather than a suggestion. When your display is properly calibrated, it also reduces the physical toll on the radiologist. Correct luminance levels prevent the chronic eye strain that occurs when the brain tries to compensate for poorly rendered images during a long shift.
The Clinical Risks of Uncalibrated Displays
Reading on uncalibrated hardware introduces significant diagnostic risk. Subtle pathology, such as microcalcifications or faint lung nodules, can easily disappear into crushed blacks or blown-out highlights. This isn't just a clinical issue; it's a legal one. Using non-compliant hardware for primary interpretation creates a massive liability during audits or malpractice reviews. Perceptual Linearity is the ability for the human eye to see equal changes in digital values as equal changes in brightness. When a display lacks this linearity, the radiologist's ability to distinguish between healthy tissue and a lesion is severely compromised.
Diagnostic vs. Clinical Review Displays
There's a clear distinction between primary diagnostic monitors and secondary review screens. Diagnostic monitors require higher peak luminance and more frequent medical display calibration to meet strict ACR standards. For example, general radiology requires displays that maintain 350 to 420 cd/m2, while mammography demands even higher resolutions and specific pixel pitches. High-performance hardware like Jusha Diagnostic Monitors provides the necessary stability to meet these benchmarks. These specialized displays are engineered to handle the heavy workloads of CT, MRI, and X-ray interpretation while maintaining the rigorous standards required for patient safety.
The Technical Pillars: DICOM Part 14 GSDF and Regulatory Standards
The foundation of every diagnostic workstation is the DICOM Part 14 Grayscale Standard Display Function. This mathematical model ensures that grayscale values are mapped consistently across different display technologies. By defining how luminance should change between digital driving levels, the GSDF creates a predictable visual experience. Achieving this requires precise medical display calibration to align the monitor's output with the Barten Model of human contrast sensitivity.
Measurement accuracy depends on the photometer, a sensor that quantifies light output. While external photometers were once the standard, modern high-performance displays often feature integrated front sensors. These internal tools allow for consistent monitoring of Lmin (minimum luminance) and Lmax (maximum luminance). The resulting luminance ratio determines the display's dynamic range. Regulatory bodies like the American College of Radiology (ACR) and the Mammography Quality Standards Act (MQSA) mandate specific ratios to ensure that no clinical detail is lost in the shadows or highlights.
Luminance and Contrast Ratio Requirements
For 2026, the industry baseline for general radiology luminance has solidified between 350 and 420 cd/m². This range ensures enough brightness to overcome typical reading room conditions while maintaining a high count of Just Noticeable Differences (JNDs). A JND represents the smallest change in luminance that the average human eye can detect. Proper medical display calibration maximizes the number of JNDs available, providing the contrast needed to identify subtle lesions. You must also account for ambient light; higher room lighting requires higher display luminance to maintain the necessary contrast ratio.
Compliance Documentation and Audits
Regulatory compliance isn't just about the display's current state; it's about proving consistency over time. Hospital accreditation and QC audits require a detailed calibration log that tracks performance history. Transitioning from manual to automated QC is a major trend for 2026, as it reduces human error and provides immediate audit-ready reports. To ensure your facility meets every requirement, you can review our 2026 Radiology Equipment Compliance Checklist. If you're looking to modernize your fleet, exploring professional solutions at Rad Made Simple can help you stay ahead of these shifting standards.
How to Calibrate Your Medical Display: A Step-by-Step Practical Guide
Successful medical display calibration requires more than just running software; it demands a controlled environment. This is especially critical for teleradiologists working from home offices. Unlike clinical suites, home environments often have fluctuating light that can compromise sensor readings. Before starting, ensure your monitor has warmed up for at least 30 minutes to stabilize the backlight. You must also control ambient light by using blackout curtains or dimmers to avoid reflections that skew data. Preparation is the foundation of accuracy.
Hardware and software choices define your workflow efficiency. You can use high-quality external colorimeters, but many modern professionals prefer the integrated Jusha sensors found in high-performance hardware. These internal tools remove human error and allow for scheduled, hands-free adjustments. While vendor-neutral software offers flexibility for mixed fleets, proprietary suites often provide deeper integration with the monitor's internal hardware. This synergy ensures the most precise alignment with the ACR–AAPM Technical Standard.
Step 1-3: Preparation and Baseline Measurement
Start by cleaning the screen surface with a microfiber cloth. Even small dust particles or fingerprints can interfere with the sensor's ability to read luminance accurately.
- Step 1: Set your target luminance and color temperature. Most diagnostic environments target a color temperature of 6500K or D65 to ensure a consistent white point across different modalities.
- Step 2: Measure the current "as-is" state of the monitor. This baseline measurement identifies how much the display has drifted from its previous calibration and determines the necessary adjustments.
- Step 3: Adjust the internal look-up table (LUT). Modern Jusha Diagnostic Monitors perform this adjustment internally, mapping digital driving levels to the GSDF curve with high precision to avoid image banding or posterization.
Step 4-5: Verification and Reporting
Once the internal adjustments are complete, you must verify the results. Visual confirmation is just as important as the data provided by the sensor.
- Step 4: Run a TG18-QC or SMPTE test pattern. These standardized images allow you to check for aliasing, moiré patterns, or non-linearities that a sensor might not detect during the automated phase.
- Step 5: Generate a comprehensive compliance report. This document serves as your official record for facility audits and hospital accreditation.
A calibration is only valid if it passes the final JND deviation test, which typically requires a deviation of less than 10%. This final check ensures that every grayscale step is perceptible to the human eye, maintaining the integrity of your diagnostic work.
Beyond the Initial Setup: Maintaining Calibration and Avoiding Common Pitfalls
Achieving initial compliance is only the first step. Routine medical display calibration ensures that your hardware continues to perform as it ages. Most facilities follow a tiered schedule: monthly checks for high-sensitivity modalities like mammography, and quarterly or annual reviews for general diagnostic screens. This frequency is necessary to combat "Backlight Aging." As LED and LCD panels age, their maximum luminance naturally decays. Without consistent monitoring, this decay causes the display to drift away from the GSDF curve, leading to lost detail and increased eye fatigue.
Teleradiologists face unique challenges in maintaining these standards outside of a hospital environment. Home offices rarely have the same environmental controls as clinical reading rooms. To manage this, many professionals rely on radiology hardware maintenance contracts. These agreements provide structured support and ensure that software updates or hardware failures don't compromise diagnostic accuracy. Proactive maintenance is the best defense against unexpected downtime.
Ambient Light Management
A common misconception in radiology is the "black room" myth. Reading in total darkness actually increases eye strain and reduces contrast perception. Instead, a small amount of controlled bias lighting behind the monitor is far more effective. Use a light meter to confirm your room lighting stays within the 20-40 lux range. This level provides enough illumination to reduce fatigue without washing out the screen's blacks. If you are using traveling radiologist workstation setups, you must recalibrate your targets to account for the unpredictable lighting of hotel rooms or temporary offices.
Troubleshooting Calibration Failures
Calibration failures often stem from software conflicts rather than hardware defects. Check your graphics card settings first. Features like "night mode" or custom gamma profiles can override your calibration software and cause an immediate GSDF check failure. Ensure your GPU is set to 10-bit output to maximize grayscale steps. If your monitor consistently fails to reach its target Lmax even after a deep reset, it's likely reaching its hardware end-of-life. At this stage, continued attempts at medical display calibration are futile. It's time to transition to a newer diagnostic monitor to maintain clinical safety. For expert guidance on selecting your next compliant workstation, consult with our imaging specialists today.
Ensuring Long-Term Compliance with Professional Imaging Solutions
Maintaining diagnostic integrity across a growing enterprise requires a shift from reactive troubleshooting to proactive, integrated management. Individual hardware checks are no longer sufficient for large-scale operations. Instead, Dextro Reading Stations provide a unified environment where hardware and software work in tandem. These stations are engineered to remove the technical friction of medical display calibration, ensuring that every component of the workstation meets 2026 regulatory benchmarks without constant manual intervention.
The core of this efficiency lies in Jusha Diagnostic Monitors and their integrated front-sensors. These sensors allow for hands-free, automated calibration that runs on a pre-set schedule. By measuring luminance directly at the screen surface, the system can automatically adjust internal look-up tables to compensate for backlight decay. Integrating these calibration alerts directly into your PACS workflow further simplifies management. When a display drifts near the edge of compliance, the system notifies the administrator immediately, preventing diagnostic errors before they occur.
The Dextro Advantage for Teleradiology
Remote teams often represent the weakest link in a facility's compliance chain. The Radcom Compact system solves this by providing a standardized, high-performance workstation that teleradiologists can deploy anywhere. This professional integration reduces the technical burden on your IT department, allowing them to act as a "Simplifier" rather than a constant repair service. By standardizing medical display calibration across a large fleet of monitors, you ensure that a study viewed in a home office looks identical to the same study viewed in a hospital's primary reading room.
Next Steps for Facility Managers
Preparing for a 2026 audit requires a clear understanding of your current fleet's status. Use this final checklist to determine if your reading stations are truly compliant:
- Hardware Integration: Do your monitors feature internal front-sensors for automated QC?
- Reporting: Can your system generate automated, audit-ready compliance logs?
- Workstation Age: Is your hardware capable of maintaining the 350-420 cd/m² luminance baseline?
- Workflow: Are calibration failures integrated into your PACS or administrative alerts?
If your current setup fails any of these points, it's time to modernize your imaging chain. Auditing your fleet now prevents the legal and clinical risks associated with non-compliant hardware. Contact Dextro Imaging Solutions for a compliance consultation or hardware upgrade.
Future-Proofing Your Diagnostic Workflow
Mastering medical display calibration is no longer a technical choice; it's a clinical necessity for audit protection and patient safety. By aligning with DICOM Part 14 standards and utilizing automated JND verification, you eliminate the guesswork that leads to diagnostic drift. Modernizing your workspace with high-performance hardware ensures that every grayscale step remains visible. This protects your practice from liability while significantly reducing the physical strain of long reading shifts. It's about creating a seamless environment where your expertise isn't limited by your display's performance.
As a leading Jusha Diagnostic Monitor distributor, Dextro Imaging Solutions provides the tools and 24/7 technical support needed for total imaging compliance. We specialize in custom-built radiology workstations that handle the heavy technical lifting so you can focus on patient care. Upgrade to DICOM-compliant Jusha Monitors and Dextro Reading Stations to secure your clinical future today. You've built your expertise on precision; don't let your hardware be the variable that compromises it. You're ready for the 2026 standards, and we're here to help you maintain them.
Frequently Asked Questions
Is DICOM calibration required for home radiology reading stations?
Yes, any station used for primary diagnostic interpretation must meet DICOM Part 14 standards. This requirement remains strict for teleradiologists working from home to ensure that pathology isn't missed due to hardware drift. Your home setup must maintain the same luminance and grayscale consistency as a hospital workstation to comply with ACR guidelines. Professionals often use Dextro Reading Stations to ensure their remote environments meet these high-stakes regulatory demands without technical friction.
How often should a diagnostic radiology monitor be calibrated?
Most standards recommend a tiered approach based on the modality. Mammography displays usually require monthly medical display calibration due to the high sensitivity of the images. For general radiology, quarterly or annual checks are typically sufficient. However, you should monitor your display for backlight aging constantly. Automated systems with integrated sensors can perform these checks daily without user intervention, providing a proactive way to maintain compliance and diagnostic integrity.
Can I use a consumer-grade colorimeter for medical display calibration?
No, consumer-grade colorimeters are generally insufficient for professional medical use. They don't have the sensitivity to measure the extremely low luminance levels required to verify the dark end of the GSDF curve. Using an uncertified sensor can lead to inaccurate reports and potential misdiagnosis. Professional setups rely on medical-grade photometers or the integrated sensors found in Jusha Diagnostic Monitors, which are specifically engineered to detect the subtle Just Noticeable Differences required for clinical accuracy.
What is the minimum luminance required for a diagnostic monitor in 2026?
For 2026, the baseline luminance for general diagnostic monitors is between 350 and 420 cd/m². This level provides enough brightness to overcome typical ambient light while maintaining a high count of Just Noticeable Differences. Mammography displays have even higher requirements, often needing 5MP resolution and specialized pixel pitches to meet ACR clinical standards. Maintaining these specific levels is a core part of medical display calibration to prevent crushed grayscale values in dense imaging.
What happens if my medical monitor fails a calibration test?
If a monitor fails, you should first investigate software or hardware interference. Check that your graphics card isn't applying night mode or custom color profiles that override the calibration. If the hardware can't reach the target Lmax even after a factory reset, the backlight has likely reached its end-of-life. At this point, the monitor is no longer safe for primary diagnosis. You should transition to a new diagnostic monitor to maintain regulatory compliance and clinical safety.
Do Jusha medical monitors come with built-in calibration sensors?
Yes, many high-performance Jusha Diagnostic Monitors are equipped with integrated front sensors. These sensors are positioned directly against the glass to measure luminance output without interference from ambient light. This hardware allows for hands-free, automated calibration cycles that run in the background. It removes the need for manual photometer tests, ensuring your display stays aligned with DICOM standards while providing documented proof of consistency for hospital quality control audits.
What is the difference between calibration and characterization in medical imaging?
Calibration is the active process of adjusting your display's internal settings to match a specific standard like the GSDF. It changes how the monitor behaves. Characterization, often called profiling, is the act of measuring and documenting the display's current performance without necessarily changing it. In medical imaging, you need both. You calibrate the hardware to the standard and then characterize it to verify that the final output falls within the acceptable 10% JND deviation threshold.
Does ambient light affect the DICOM calibration of my monitor?
Ambient light has a direct impact on how you perceive grayscale on your screen. High levels of room light can wash out the dark areas of an image, making it harder to see subtle pathology. To maintain compliance, you should keep your reading room between 20 and 40 lux. If your environment changes, you'll need to adjust your calibration targets. Professional workstations are often calibrated with specific ambient light offsets to ensure the display remains perceptually linear in its actual working environment.


