

A diagnostic monitor can look right on paper and still be the wrong fit for a reading room. The jusha m350g is a 3MP monochrome display, but its resolution alone can’t tell you whether it suits your imaging workload, viewing environment, and existing systems. Buyers need clear, comparable details before making that decision.
When model information is scattered or difficult to compare, it helps to use a consistent evaluation process. This guide explains which Jusha M350G specifications to review, how to compare them with your diagnostic workflow, and what to plan for before purchasing. It also explains why current manufacturer documentation and applicable regulatory information belong in that review.
Use the steps below to assess image requirements, calibration and quality-assurance features, system integration, and operational fit without relying on the model name alone. Monitor selection also needs to account for workstations and PACS, so you can plan for the full reading environment. The goal is an informed decision and a practical path from evaluation to implementation support.
Key Takeaways
- Separate documented Jusha M350G details from broader monitor-selection criteria to keep your evaluation evidence-based.
- Use the jusha m350g specification review to identify which display characteristics may matter for your diagnostic tasks.
- Compare intended use, modality, resolution, calibration, connectivity, and support against your department’s requirements.
- Bring radiologists, imaging IT, procurement, and biomedical engineering into the evaluation and deployment plan.
- Connect monitor selection with workstation and PACS planning. Dextro Imaging Solutions supports installation, maintenance, and software integration.
Jusha M350G: What Buyers Can Establish from Available Product Information
The Jusha M350G is the model buyers are researching, but a model name alone doesn’t establish its technical capabilities or role in a clinical workflow. Manufacturer materials identify diagnostic-monitor categories, but category information is not a substitute for a complete, readable specification sheet. Use current product documentation to confirm the details you need for a technical comparison.
A diagnostic display is a screen intended to present medical images for review or interpretation within a defined clinical workflow. That describes the category, not the performance or approved use of a particular model. Medical images come from different techniques and systems; the broad Medical Imaging Overview offers context for the range of imaging methods involved.
What the search results do, and do not, establish
Manufacturer navigation can help locate a product family, but category labels aren’t specifications. They don’t establish resolution, luminance, grayscale presentation, calibration behavior, or intended clinical applications. A product document is useful for evaluation when it is readable and clearly tied to the exact model and a current version.
Keep the evidence organized in two groups:
- Product identification: the manufacturer’s pages direct readers to diagnostic-monitor categories, and a PDF is associated with the model.
- Details to verify: specifications, intended use, supported workflows, and regulatory status.
This distinction prevents a common procurement error: treating a search-result title, navigation label, or unreadable document as proof of a product capability. Record the document title and revision for each detail before using it in a purchasing comparison.
Why intended use matters when researching a monitor model
General image review and diagnostic interpretation aren’t interchangeable tasks. A display used to view images for reference may face different workflow requirements from one used by a radiologist to interpret studies. The model name doesn’t identify which task the manufacturer supports, whether the product is intended for a specific modality, or what regulatory status applies in the buyer’s market.
Use current product labeling and manufacturer documentation to establish intended use and relevant regulatory information. Then define the work the display must support before comparing options:
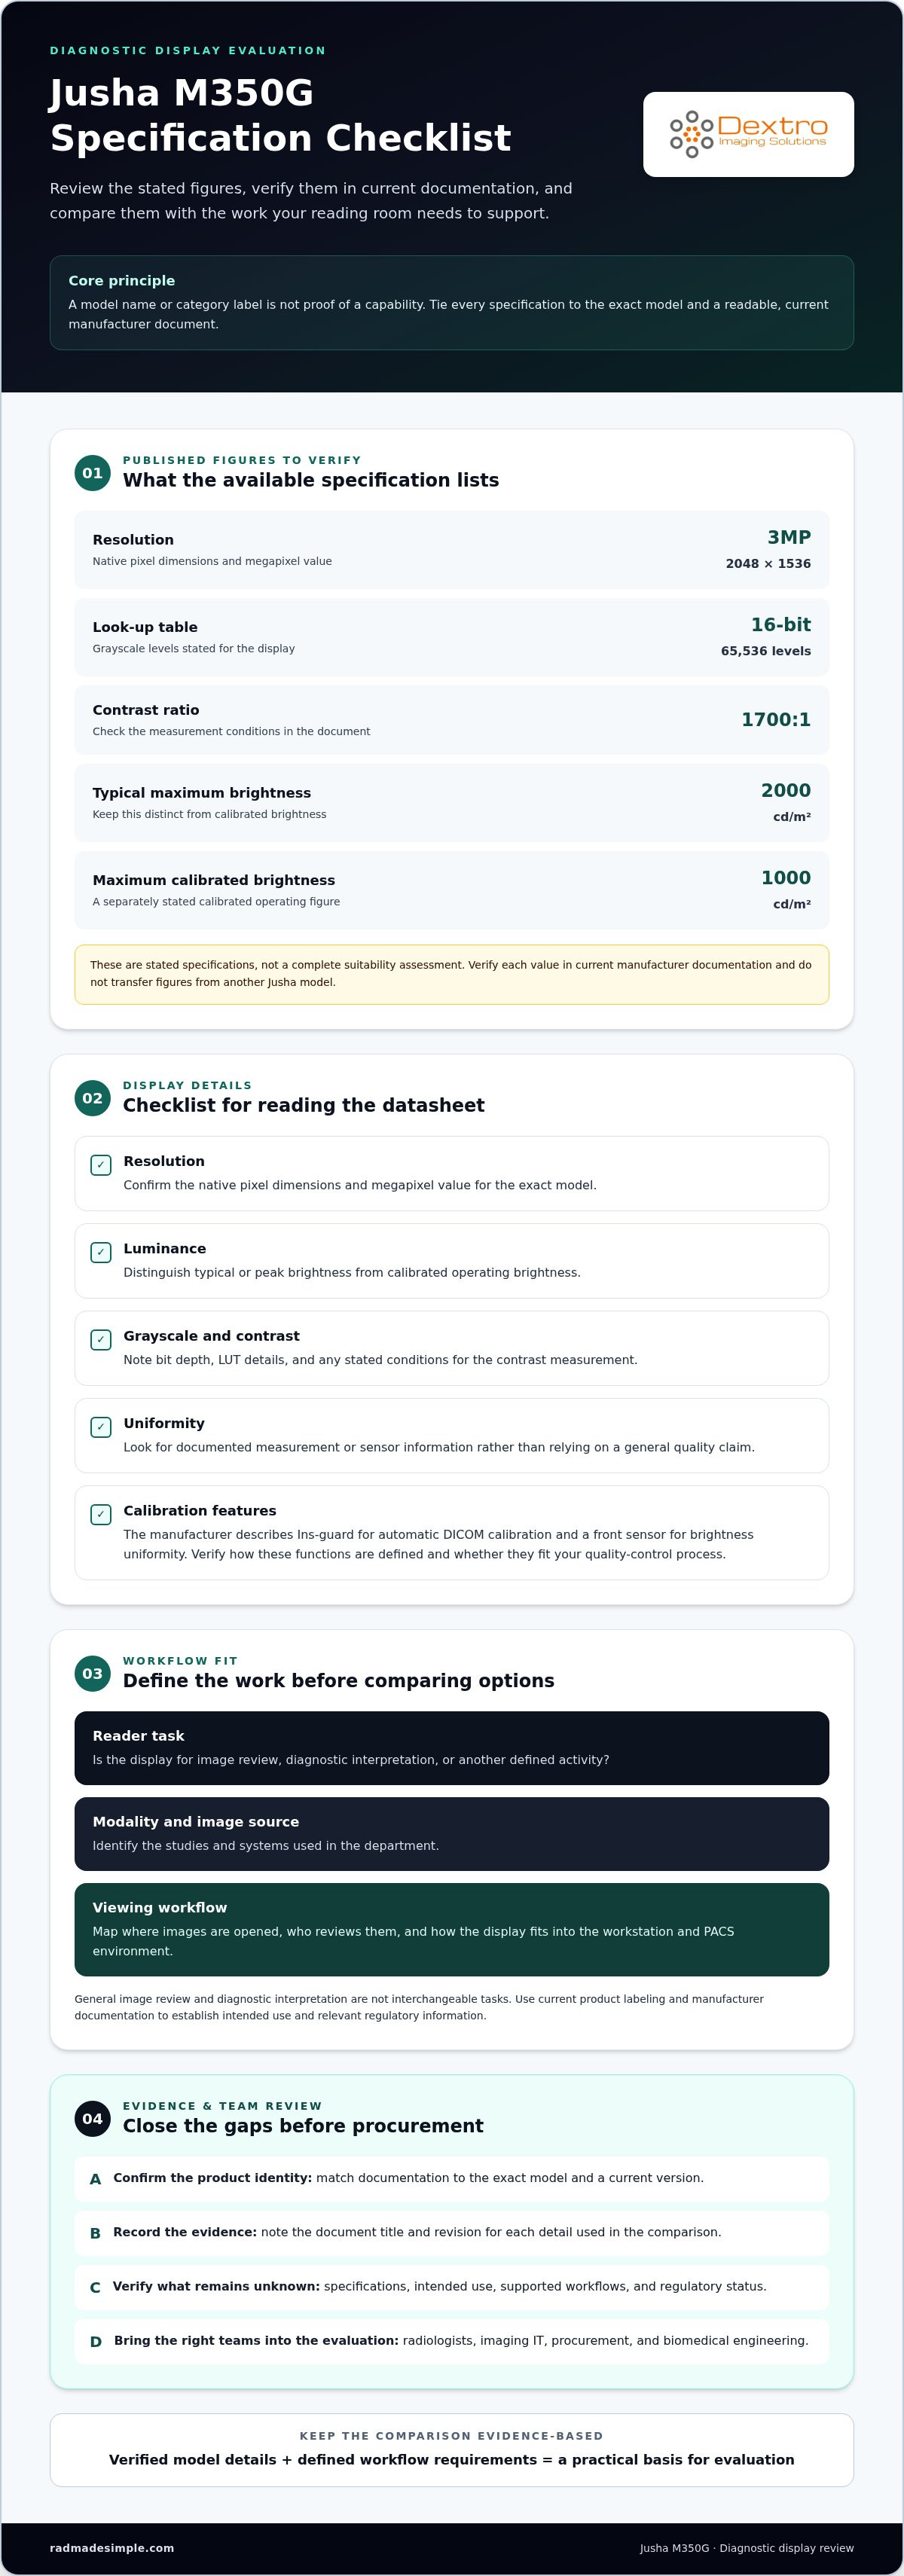
- Reader task: image review, diagnostic interpretation, or another defined activity.
- Modality and image source: the studies and systems used in the department.
- Viewing workflow: where images are opened, who reviews them, and how the display fits into the workstation and PACS environment.
These criteria create a practical basis for evaluation without attributing undocumented features to the Jusha M350G. Compare verified model details with your workflow rather than relying on the name alone.
Which Jusha M350G Specifications Matter for Diagnostic Imaging?
Specifications help buyers compare a display only when each value is tied to the correct model and measurement conditions. Published specifications for the jusha m350g include 3MP resolution (2048 × 1536), a 16-bit look-up table (65,536 grayscale levels), a 1700:1 contrast ratio, typical maximum brightness of 2000 cd/m², and maximum calibrated brightness of 1000 cd/m². Treat these as stated figures, then verify them in current manufacturer documentation and assess the display in its intended workflow.
Specification comparisons are meaningful only when the measurement conditions, operating mode, and model configuration match. For each figure, record the exact model identifier, the manufacturer document title, and its revision or publication date. Use a current, readable manufacturer document to verify the values, and don’t transfer figures from another Jusha model.
Display performance details to locate in the datasheet
Review the figures in context. Resolution describes the number of image pixels the display can present, while luminance describes emitted brightness. Grayscale depth indicates the number of available gray levels, and contrast ratio compares the brightest white with the darkest black under specified conditions. These characteristics influence image presentation, but their values alone don’t determine clinical suitability.
- Resolution: confirm the native pixel dimensions and megapixel value.
- Luminance: distinguish typical or peak brightness from calibrated operating brightness.
- Grayscale and contrast: note bit depth, LUT details, and the measurement conditions stated for contrast.
- Uniformity: look for documented measurement or sensor information, not a general quality claim.
The manufacturer describes an Ins-guard function for automatic DICOM calibration and a front sensor for brightness uniformity. Check the current document for how these functions are defined and whether their stated operation matches your quality-control process. A feature name alone doesn’t establish a specific performance level.
Calibration, DICOM, and quality-control documentation
DICOM grayscale presentation and calibration details help explain how a monitor is configured to display grayscale images. The manufacturer describes Ins-guard as supporting real-time, automatic DICOM calibration. Confirm the precise wording and applicable conditions in current model documentation, then compare them with facility protocols. DICOM conformance or a calibration feature alone doesn’t establish suitability for every diagnostic task or modality.
For procurement, retain the supporting document with the specification comparison. Imaging IT and biomedical engineering can review calibration and quality-control implications, while radiologists assess the image-review task. Regulatory classification is a separate question: the FDA Medical Device Classification resource explains how the agency approaches device classification, but it doesn’t verify the status of an individual model.
Once you’ve recorded the values and document revisions, compare them against the workflow and connected workstation or PACS environment. For a broader planning perspective, explore radiology workflow planning as you map display requirements to deployment needs.
How to Compare the Jusha M350G with Your Imaging Requirements
Compare the jusha m350g against the reading task and system it must support, not against another model’s name or a broad marketing claim. Start with current manufacturer documentation, then record the document behind every value. A blank field is useful because it flags information to verify instead of inviting assumptions.
Match display requirements to modality and reading task
Define whether the display is intended for primary diagnosis, secondary review, or another specific task. CT, MRI, and radiography describe imaging contexts, but their mention doesn’t establish that a particular monitor is suitable for them. Mammography can involve distinct requirements, so confirm applicable standards and the manufacturer’s stated intended use for that task before treating a display as a match.
Use this comparison table as a working record. The resolution entry reflects the published manufacturer specifications summarized here; verify it against current documentation before procurement.
| Comparison area | Jusha M350G evidence to record | Workflow question |
|---|---|---|
| Intended use | Verify exact wording in current product labeling. | Primary diagnosis, secondary review, or another task? |
| Modality | Confirm supported applications in manufacturer documentation. | Which studies will readers interpret or review? |
| Resolution | 3MP, 2048 × 1536; verify against the current datasheet. | Does the documented resolution meet the reading task? |
| Calibration | Review current documentation for DICOM and calibration details. | How does setup align with facility quality-control processes? |
| Connectivity | Verify available inputs and system requirements in the datasheet. | Can the planned workstation configuration support the display? |
| Support | Document the support arrangements for the project. | Who handles installation, maintenance, and integration? |
Assess workstation and PACS integration needs
Map the monitor to the reading station, image sources, viewing software, and existing PACS workflow. For example, a display may meet a resolution target yet still require review of the workstation’s output, software configuration, and local quality-control process. The radiology reading workstation guide provides broader system-level context for that assessment.
Apply the same evidence standard when reviewing other displays: compare intended task, documented specifications, integration needs, and support arrangements. For a wider view of monitor categories, consult the Jusha medical monitor reference guide. Facility teams can also use the AAPM Display Quality Assurance Guidelines as a reference when aligning display assessment with local quality-assurance protocols.
Keep unresolved items visible in the comparison rather than filling gaps with estimates. That gives radiologists, imaging IT, procurement, and biomedical engineering a shared basis for deciding whether the documented configuration fits the workflow.
A Practical Jusha M350G Evaluation Checklist for Imaging Teams
A clear review process helps an imaging team move from model research to a workable deployment plan. Evaluate the jusha m350g in sequence, separating the display’s documented characteristics from site readiness, software integration, and ongoing quality-control responsibilities. This keeps clinical, technical, and procurement decisions connected without making one team responsible for every part.
Document the clinical and technical requirements
Start with the clinical task, then build a shared record of requirements and evidence. Involve radiologists in defining how images will be reviewed, and imaging IT in mapping the display to workstations, image sources, and PACS. Procurement can track documentation and purchasing criteria, while biomedical engineering reviews equipment and maintenance considerations.
- Define the reading task. Record whether the display is intended for primary diagnosis, secondary review, or another defined use. Note the modality, viewing environment, and applicable facility policies.
- Build a source-linked specification sheet. Enter each relevant value exactly as it appears in current manufacturer documentation. Include the model identifier, document title, revision date, and source for each entry. Mark unavailable information for verification instead of estimating it.
- Review technical dependencies. Imaging IT should document the workstation configuration, image sources, PACS workflow, software, and connectivity requirements. Separate what is known about the monitor from what depends on the wider system.
- Review procurement and documentation. Procurement can organize the specification record, product labeling, and applicable regulatory documentation. The radiology equipment compliance checklist offers a broader framework for organizing equipment records.
Plan implementation, validation, and ongoing support
Product evaluation is only one part of readiness. Before deployment, coordinate workstation configuration and software integration with the teams responsible for those systems. Define how the facility will validate the complete viewing setup, rather than assuming that a monitor specification alone establishes readiness for clinical use.
- Assign quality-control responsibilities. Identify who follows facility calibration and quality-control protocols, how results are documented, and who reviews issues that arise.
- Plan maintenance and escalation. Agree on responsibility for routine maintenance and a clear route for reporting technical or image-presentation concerns. Keep these operational plans distinct from the manufacturer’s specifications.
- Review deployment readiness together. Radiologists, imaging IT, procurement, and biomedical engineering should review the evidence and outstanding tasks before the display enters its intended workflow.
This sequence supports a decision based on documented facts and local needs, not assumptions tied to a model name. For help connecting monitor selection with installation, maintenance, and software integration planning, explore Dextro’s radiology monitor solutions.
Explore Jusha Diagnostic Monitors with Dextro Imaging Solutions
Monitor selection is one part of building a dependable imaging environment. Dextro Imaging Solutions sells Jusha diagnostic monitors alongside radiology workstations and imaging software, helping facilities consider display needs in the context of the wider reading workflow. Dextro also supports installation, maintenance, and software integration for radiology departments, hospitals, and imaging centers.
When researching a specific model such as the jusha m350g, establish its specifications, intended use, and regulatory details from current manufacturer documentation. Then assess whether those details align with the facility’s clinical tasks and technical environment.
Connect monitor selection to the broader imaging environment
A diagnostic monitor operates within a system. Radiologists view images through software on a workstation, with studies moving through the facility’s PACS workflow. A change to one element can affect configuration, integration, and quality-control planning, so map the full environment before deployment.
Start by documenting how readers access studies and what the facility needs the display to support. Include the relevant image sources, workstation setup, viewing software, and local quality-control processes. Imaging IT can identify system dependencies, while radiologists describe the reading tasks and biomedical engineering contributes equipment and maintenance considerations. This coordination helps teams evaluate requirements against relevant documentation before deciding whether a configuration fits.
Dextro’s installation, maintenance, and software integration support can be incorporated into equipment planning alongside monitor and workstation decisions. Build a coordinated project plan that accounts for the display, the surrounding systems, and the facility’s operational responsibilities.
Move from model research to a practical solution
Bring a concise set of information to a monitor discussion. A well-prepared team can focus on requirements rather than spending time reconstructing its research:
- Clinical context: intended reading task, modalities, users, and viewing environment.
- Product evidence: exact model identifier, current manufacturer documentation, and source-linked specifications.
- Technical environment: workstation configuration, image sources, PACS workflow, and software dependencies.
- Project planning: installation needs, integration priorities, quality-control responsibilities, and maintenance considerations.
This information connects product evaluation with the practical work required to introduce equipment into an imaging department. Dextro sells Jusha monitors and provides technical support, bringing monitor requirements and the surrounding workflow into the same discussion. For a focused conversation about your facility’s needs, discuss diagnostic monitor solutions.
Turn Your Monitor Review into a Clear Project Plan
Turn your research into a decision your whole team can support. For the jusha m350g, keep the model’s documented details connected to the clinical need they’re meant to address. This creates a clear reference point for procurement and helps prevent assumptions from becoming project requirements.
Bring clinical and technical perspectives together early. A shared understanding of priorities gives your team a stronger basis for planning equipment, software, and implementation as one connected project. It also makes it easier to identify open questions, assign ownership, and keep decisions grounded in the facility’s actual workflow.
Dextro works with radiology departments, hospitals, and imaging centers on diagnostic monitor needs and the surrounding imaging environment. Discuss your goals, workflow context, and equipment plans with the team. Plan your diagnostic monitor project with Dextro.
Frequently Asked Questions
Is the Jusha M350G a diagnostic monitor?
Yes. Available product information identifies the Jusha M350G as a monochrome diagnostic display intended for primary diagnosis in radiology. That stated purpose doesn’t establish suitability for every clinical task or facility. Before including it in a reading-room plan, review current manufacturer labeling and relevant regulatory documentation, then check that the intended use matches your department’s policies and the work radiologists will perform.
What resolution does the Jusha M350G have?
The Jusha M350G has a documented resolution of 3 megapixels, or 2048 × 1536 pixels. Record this as the model’s stated resolution and distinguish it from software scaling or workstation output settings. When comparing displays, use the exact model identifier and current manufacturer specifications for each candidate. That makes it easier to identify genuine differences rather than comparing values from different models.
Can the Jusha M350G be used for mammography?
Don’t assume mammography suitability from the M350G’s diagnostic-monitor category or its general radiology purpose. Mammography may have specific display and regulatory considerations. Review the current manufacturer labeling for an explicit intended-use statement, then have radiology leadership and the facility’s compliance or biomedical engineering team assess the proposed configuration against applicable requirements. A general diagnostic designation alone isn’t evidence that a monitor is appropriate for every imaging task.
Does the Jusha M350G support DICOM calibration?
Available manufacturer information describes an Ins-guard function for real-time, automatic DICOM calibration. Check current documentation for the precise function description and any stated operating conditions, then compare those details with your facility’s quality-control process. A DICOM calibration feature can inform technical evaluation, but it doesn’t by itself establish suitability for every modality or diagnostic workflow. Keep the supporting document with your equipment records.
How much does the Jusha M350G cost?
For a meaningful budget discussion, identify the monitor model and outline any workstation, software integration, installation, or support needs so the project scope is clear. Dextro sells Jusha diagnostic monitors and can discuss your imaging-equipment requirements. Compare proposals using the same equipment and support assumptions rather than treating unlike project scopes as equivalent.
What should an imaging team review before installing a Jusha M350G?
Before installation, name a clinical owner and a technical owner for the proposed setup. Radiology leadership can define the intended reading task, while imaging IT maps the workstation and PACS workflow. Biomedical engineering can coordinate equipment and maintenance considerations, and procurement can retain product and regulatory documentation. Agree on who will perform acceptance checks, manage quality-control records, and route technical issues after deployment.


