

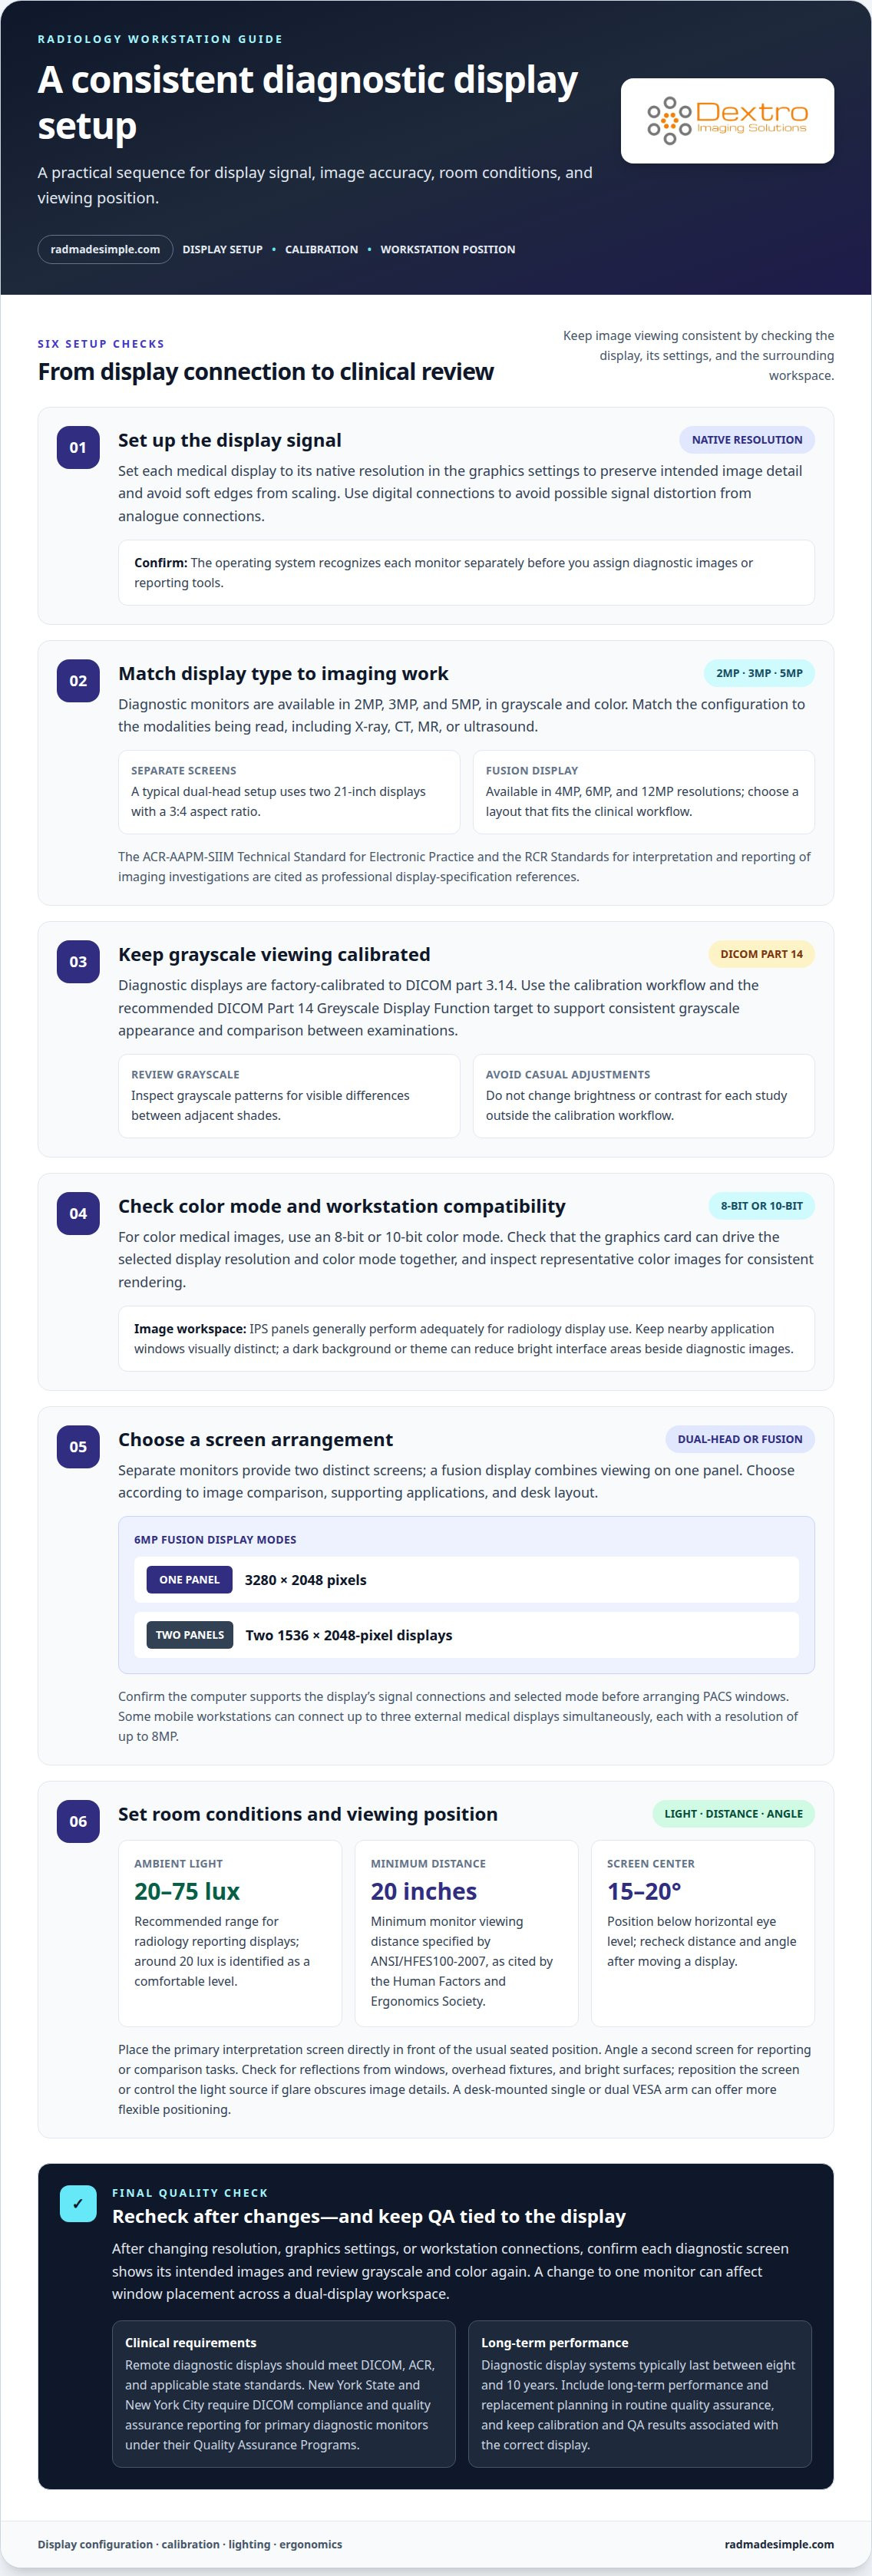
A dual monitor setup for radiologists doesn’t have to mean two separate screens. You can choose a dual-head pair or a single fusion display, depending on how you compare studies, arrange other applications, and use your desk. A typical dual-head setup uses two 21-inch displays with a 3:4 aspect ratio. A 6MP fusion display can be configured as one 3280 × 2048-pixel display or as two 1536 × 2048-pixel displays.
Separate monitors give you two distinct screens, while a fusion display combines viewing on one panel. The right choice depends on your reading workflow and which layout keeps images and supporting information easy to access. This guide compares the options and explains how to configure brightness, contrast, calibration, room lighting, reflections, and workstation positioning. You’ll also learn how to arrange the displays for practical, consistent viewing without unnecessary complexity.
Key Takeaways
- Choose between separate diagnostic displays and a fusion screen based on how you compare images and organize supporting applications.
- Set brightness and contrast for consistent image viewing, then use calibration to support grayscale accuracy.
- Reduce distracting reflections and keep room lighting comfortable and controlled around the reading station.
- Arrange displays, PACS, and reporting tools within a practical viewing layout that supports your reading workflow.
Display brightness, contrast, and image accuracy
- Set each medical display to its native resolution in the computer’s graphics settings. This preserves the panel’s intended image detail and avoids softening edges through scaling. Use digital connections between the graphics card and displays to avoid possible signal distortion from analogue connections. Before assigning diagnostic images or reporting tools, confirm that the operating system recognizes each monitor separately.
- Match the display type and resolution to the imaging work. Diagnostic monitors are available in 2MP, 3MP, and 5MP options, in grayscale and color. The ACR-AAPM-SIIM Technical Standard for Electronic Practice is a reference for professional display specifications. Choose a configuration suited to the modalities being read, including X-ray, CT, MR, or ultrasound.
- Keep brightness and contrast controlled through the diagnostic display’s calibration workflow, rather than adjusting them casually for each study. Diagnostic displays are factory-calibrated to DICOM part 3.14, and the recommended calibration target is the DICOM Part 14 Greyscale Display Function. This helps maintain consistent grayscale appearance across images and supports reliable comparison between examinations.
- For color medical images, use an 8-bit or 10-bit color mode. Check that the graphics card can drive the selected display resolution and color mode together. IPS panels generally perform adequately for radiology display use. Keep nearby application windows visually distinct, and use a dark background or theme where appropriate to reduce bright interface areas beside diagnostic images.
- Choose a dual-head setup when separate screens suit your image comparison and reporting workflow. Consider a fusion display when one continuous panel better fits the workstation. A 6MP fusion display can operate as one 3280 × 2048-pixel display or two 1536 × 2048-pixel displays. Confirm the computer supports the display’s signal connections and selected mode before arranging PACS windows across it.
Final checks for calibration, lighting, and reflections
Complete the setup by checking grayscale and color calibration, room lighting, and screen reflections. These checks help maintain consistent image viewing across the workstation.
-
Verify Grayscale and Color Calibration
Run the display’s calibration process and confirm it follows the DICOM Part 14 Greyscale Display Function. Review grayscale patterns for visible differences between adjacent shades, then inspect representative color images for accurate, consistent rendering. Avoid changing brightness or contrast outside the calibration workflow, because manual adjustments can disrupt the calibrated appearance across diagnostic windows.
-
Check Lighting and Reflections
Measure ambient light near the reporting display and adjust it to a comfortable level around 20 lux. The recommended range for radiology reporting displays is 20 to 75 lux. Look for reflections from windows, overhead fixtures, and bright surfaces while seated at the reading position. Reposition the display or control the light source if glare obscures image details.
- Review the quality assurance requirements for your clinical setting. Remote diagnostic displays should meet DICOM, ACR, and applicable state standards. In New York State and New York City, DICOM compliance and quality assurance reporting are mandatory for primary diagnostic monitors under their Quality Assurance Programs. Keep calibration and QA results associated with the correct display.
- Repeat the visual review after changing the display resolution, graphics settings, or workstation connections. Confirm that each diagnostic screen shows its intended images, then recheck grayscale and color content. A change to one monitor can affect window placement across a dual-display workspace. Restore the established calibration workflow before using the revised setup for clinical image review.
Also confirm that the graphics card drives each display at its native resolution for the best resolution performance. Some mobile workstations can connect up to three external medical displays simultaneously, each with a resolution of up to 8MP, so verify the intended layout and image assignment. Diagnostic fusion displays are available in 4MP, 6MP, and 12MP resolutions; match the selected configuration to the clinical workflow.
Positioning also affects comfortable, consistent review. Consider a desk-mounted single or dual VESA arm instead of the display's packaged stand for more flexible positioning and ergonomics. The guide identifies the RCR Standards for interpretation and reporting of imaging investigations as a source of professional display specifications. Since diagnostic display systems typically last between eight and 10 years, include long-term performance and replacement planning in routine quality assurance.
Radiology reporting workstation layouts
- Place the primary reading screen directly in front of your usual seated position. A typical dual-head radiology setup uses two 21-inch displays with a 3:4 aspect ratio. For a dual monitor setup for radiologists, assign the screen used for image interpretation to the central viewing position, then angle the second screen for reporting or comparison tasks. This keeps the main image area easy to view while supporting a clear work sequence.
- Set a suitable distance before adjusting screen height. ANSI/HFES100-2007 specifies a minimum monitor viewing distance of 20 inches, according to the Human Factors and Ergonomics Society. Position the screen center 15-20 degrees below horizontal eye level. This viewing angle helps establish a comfortable posture for reading and reporting. Recheck distance and angle after moving either display.
- If the supplied stand limits positioning, consider a desk-mounted single or dual VESA arm. An adjustable mount can help align the screens and free up desk space. A dual monitor setup for radiologists should keep both displays within a consistent viewing arc, without requiring repeated leaning or large head turns. Test the arrangement from your usual reading position before settling on it.
- Map each screen to a specific workstation task. Keep diagnostic images on the primary display and reporting or RIS windows on the secondary screen. A hypothetical five-monitor workstation uses four diagnostic monitors and one RIS monitor, with displays 19 inches wide. That example shows how role-based placement can organize a larger configuration. For a two-screen setup, preserve the same clear division between image review and supporting information.
A hypothetical radiologist setup uses five LCD monitors: four diagnostic monitors and one RIS monitor. On the rectangular imaging desk, the nearest monitor is 9 inches closer to the radiologist than either far-left or far-right monitor.
For the ten-monitor setup, the movable array's adjustment range is 10 inches; the stacked cockpit desk arrangement has a 1-inch monitor focal-length difference. Without stacking, ten 19-inch monitors would require a desk 190 inches wide.
Dual split-screen PACS viewing and reporting
Arrange PACS windows around the reading task so image review and reporting stay visible without competing for attention.
- Set the computer to extend the desktop across both displays rather than duplicate the same view. In the operating system’s display settings, arrange the screens to match their physical left-to-right positions. This lets you move PACS and reporting windows between displays naturally. Before opening a study, confirm that the pointer crosses between screens at the correct edge.
- Assign the primary diagnostic display to the PACS image viewport. Keep the study at a useful size, with the image area clear of toolbars and unrelated windows. Position patient and study navigation where it remains accessible without covering images. For example, keep the active series on the primary screen while reviewing prior examinations.
- Use the second display for reporting and supporting PACS panels. Position the report editor, worklist, or reference information so it stays visible during image review. Keep the active study clearly associated with its report, and avoid placing unrelated patient windows beside the current case. Separating images from documentation can reduce window switching while keeping the workspace clear.
- Test the split-screen arrangement with a representative workflow. Open a study, move between its series, compare available prior images, and enter a report. Check whether dialogs open on the wrong screen or windows obscure the active viewport. Adjust the operating system’s display arrangement and PACS window placement until each task is easy to find.
- Save a practical window layout if your PACS supports saved workspace arrangements. Keep frequently used image controls near the viewport and reporting tools on the secondary display. After changing monitor positions or resolution, reopen the workflow and confirm windows still appear where intended. For a more connected reading workflow, explore PACS workflow options that suit your workstation configuration.
Dextro Imaging Solutions: Jusha Diagnostic Monitors
Dextro Imaging Solutions offers Jusha diagnostic monitors for radiology reading environments. If you’re planning a workstation or refining a dual-screen configuration, consider how the diagnostic displays, reading station, and PACS support your daily workflow. Dextro Reading Stations and PACS Harmony address workstation and imaging workflow needs, while Radcom Compact is another workstation option. The right combination depends on how you organize image review and reporting, and which parts of your setup need attention. Contact Dextro Imaging Solutions to discuss options for your radiology workstation.
Build a workstation that fits your next workflow
A well-planned dual monitor setup for radiologists should support changes in your reading environment, not just the cases on today’s worklist. As workflows evolve, display placement, reporting tools, and PACS access need to work together without making routine tasks harder. Identify the part of your current setup that creates the most friction, then make it the priority for your next workstation decision.
Dextro Imaging Solutions offers Jusha Diagnostic Monitors, Dextro Reading Stations, and Radcom Compact to support radiology workstation needs. These options provide a starting point for discussing how your displays and reading environment fit together. If you’re planning an update or refining an existing configuration, contact Dextro Imaging Solutions to discuss the right next step for your workflow.
With a clear priority and a suitable configuration, you can shape a reading space around your practice. Make each adjustment with purpose to keep your workflow moving smoothly.
Frequently Asked Questions
Dual-head set-up or a single fusion display?
Choose two separate monitors if you want one screen for current images and another for prior studies. A fusion display may suit a workflow that benefits from one broad viewing surface, with image areas arranged within a single panel. Consider how your PACS handles windows and whether your desk and graphics connections support the layout you prefer.
What monitor specifications are required for diagnostic radiology reading?
Match resolution and grayscale or color capability to the imaging modality and reading task. Diagnostic displays are available in 2MP, 3MP, and 5MP options, in grayscale and color. For selecting display characteristics, use the ACR-AAPM-SIIM Technical Standard for Electronic Practice as a professional reference. Mammography has separate display requirements from the other modalities discussed in this guide.
What graphics card, workstation, and connectivity are needed for a dual-monitor radiology setup?
Choose a workstation graphics card that can drive both displays at their native resolutions and has the required outputs. Connect displays digitally to avoid possible signal distortion from analogue connections. A fusion monitor uses two video signal cables from the graphics card, while separate monitors need compatible outputs for each screen. Confirm that the operating system can extend its desktop across the connected displays.


